RV Solar Panel Installation: Complete DIY Guide

Jake has spent 8 years full-timing in a Class A motorhome and has personally tested hundreds of RV products across North America. He is the lead gear reviewer at Shop RV Gear, covering solar setups, backup safety syst…
Why trust us
Every product featured on Shop RV Gear is researched by RV owners with real on-road experience. Our lead reviewer Jake Morris has full-timed for 8 years and personally tested gear across 40+ states. We earn a small commission on qualifying purchases — this never influences our picks.
🛠 What you'll need
-
 View on Amazon →Renogy Solar Charge Controller Rover 40A 12V24V Auto Parameter DC Input MPPT Charge Controllers for Solar Panels Adjustable LCD for Gel Sealed Flooded Lithium Battery$188.90
 -
 View on Amazon →Renogy Solar Panel Mounting Z Brackets Lightweight Aluminum Corrosion-Free Construction for RVs, Trailers, Boats, Yachts, Wall and Other Off Gird Roof Installation, one set of 4 Units,Gray$10.99
 -
 View on Amazon →Renogy 200 Watt 12 Volt Monocrystalline Solar Panel Starter Kit with 2 Pcs 100W Solar Panel and 30A PWM Charge Controller for RV, Boats, Trailer, Camper, Marine ,Off-Grid System$159.99
 -
 View on Amazon →Solar Panel Mounting Brackets, 8PCS Adjustable RV Solar Panel Mount, Tilt Angle 10-60 Roof Mounting Kit for Solar Panels 400 W, 500 W$51.99
RV Solar Panel Installation: Complete DIY Guide
If you’re searching for an rv solar panel installation guide, you’re likely ready to camp longer, rely less on hookups, and keep your batteries charged wherever the road takes you. The good news: a DIY RV solar setup is very doable if you plan carefully, choose compatible components, and follow safe wiring practices.
In this guide from Shop RV Gear, we’ll cover the tools and materials you need, how to size your system, step-by-step installation instructions, and a buyer-focused comparison to help you choose the right solar setup for your RV.

Side-by-Side Comparison Table
| Setup Type | Best For | Typical Panel Size | Battery Match | Pros | Cons |
|---|---|---|---|---|---|
| Portable Solar Kit | Weekend campers | 100W-200W | 50Ah-100Ah | Easy setup, no roof drilling, movable for sun | Less secure, slower charging, takes storage space |
| Basic Roof-Mounted System | Casual boondocking | 200W-400W | 100Ah-200Ah | Always charging, clean install, good value | Limited for high-power appliances |
| Expanded Roof Solar System | Frequent off-grid use | 400W-800W | 200Ah-400Ah lithium | Better autonomy, supports fridge and electronics | Higher cost, more wiring complexity |
| Full Off-Grid RV System | Heavy power users | 800W+ | 400Ah+ lithium | Best performance, inverter-friendly, long stays off-grid | Most expensive, advanced install required |
Clear Verdict
For most RV owners, the best balance of cost, simplicity, and performance is a 400W to 600W roof-mounted system with an MPPT controller and 200Ah lithium battery bank. It covers typical daily loads well without becoming overly complex.
Key Takeaways
- Start by calculating your daily power use before buying panels or batteries.
- A basic RV solar system includes panels, a charge controller, battery bank, inverter, fuses, wiring, and mounts.
- MPPT charge controllers usually offer better efficiency than PWM controllers.
- Roof layout, cable routing, and battery type all affect installation difficulty.
- Safety matters: disconnect power sources, fuse every major circuit, and seal all roof penetrations correctly.
What You Need for an RV Solar Installation
Before you begin, gather all major components and tools.
Core Components
- Solar panels
- Charge controller (MPPT or PWM)
- Battery bank (AGM or lithium)
- Inverter, if you want to run household AC devices
- Mounting brackets or adhesive mounts
- Solar cables and connectors
- Fuse block, inline fuses, or breakers
- Battery monitor
- Roof gland or cable entry plate
- Sealant compatible with your RV roof
Tools and Supplies
- Drill and drill bits
- Screwdrivers and socket set
- Wire crimper and stripper
- Multimeter
- Sealant gun
- Fish tape or pull wire
- Butyl tape
- Zip ties and cable clamps
- Safety gloves and eye protection
- Ladder and non-slip shoes
How to Size Your RV Solar System
The biggest DIY mistake is buying a kit before knowing your power needs.

Step 1: Estimate Daily Energy Use
List the devices you use each day and their watt-hours.
Example:
- LED lights: 40W x 4 hours = 160Wh
- Vent fan: 30W x 6 hours = 180Wh
- Laptop: 60W x 3 hours = 180Wh
- 12V fridge: 50W average x 24 hours = 1,200Wh
Total daily use: 1,720Wh
Step 2: Size Your Battery Bank
For one day of usable storage, match battery capacity to your daily usage.
- 1,720Wh ÷ 12V = about 143Ah
- For lithium batteries, 200Ah is a practical target
- For AGM batteries, you’ll need more capacity because usable depth of discharge is lower
Step 3: Size Your Solar Array
Divide daily watt-hours by average peak sun hours.
- 1,720Wh ÷ 5 sun hours = 344W minimum
- Add a buffer for cloudy weather and system losses
- A 400W to 600W array is a realistic choice for many mid-size RVs
RV Solar System Options Compared
Choosing the right setup depends on your camping style, roof space, and budget.
Buyer’s Guide: Best RV Solar Setup Types
Rather than recommending one brand-specific kit, it’s smarter to choose by use case.
1. Portable Solar Kit
Best for: occasional campers and renters
Pros
- No roof drilling required
- Quick to deploy
- Easy to upgrade later
Cons
- Must be set up each time
- Vulnerable to theft or weather
- Less convenient for daily charging
2. 200W-400W Starter Roof Kit
Best for: small trailers, couples, weekend boondocking
Pros
- Affordable entry point
- Enough for lights, fans, charging devices
- Easier DIY installation
Cons
- Limited reserve for cloudy days
- May not keep up with compressor fridges or inverter loads
- Expansion can require controller upgrades
3. 400W-600W Mid-Range Solar System
Best for: most RV owners
Pros
- Strong balance of output and roof space
- Works well with lithium batteries
- Supports longer off-grid stays
Cons
- Higher upfront cost
- More roof planning required
- Cable management becomes more important
4. 800W+ Advanced Off-Grid System
Best for: full-timers and power-heavy rigs
Pros
- Maximum charging potential
- Better for microwave, coffee maker, and larger inverter use
- Greater resilience in mixed weather
Cons
- Complex installation
- More weight and cost
- Requires careful battery and inverter design
Step-by-Step RV Solar Panel Installation Guide
1. Plan the Roof Layout
Measure your roof and identify obstacles such as AC units, vents, antennas, and skylights. Panels should avoid shade whenever possible, since even partial shading can reduce output significantly.
Practical tip: Leave room for future maintenance and possible panel expansion.
2. Choose Panel Mounting Method
Common options include:
- Z-brackets for rigid panels
- Tilt mounts for seasonal optimization
- Adhesive mounts for select lightweight applications
For most RVs, rigid panels with brackets offer the best mix of durability and value.
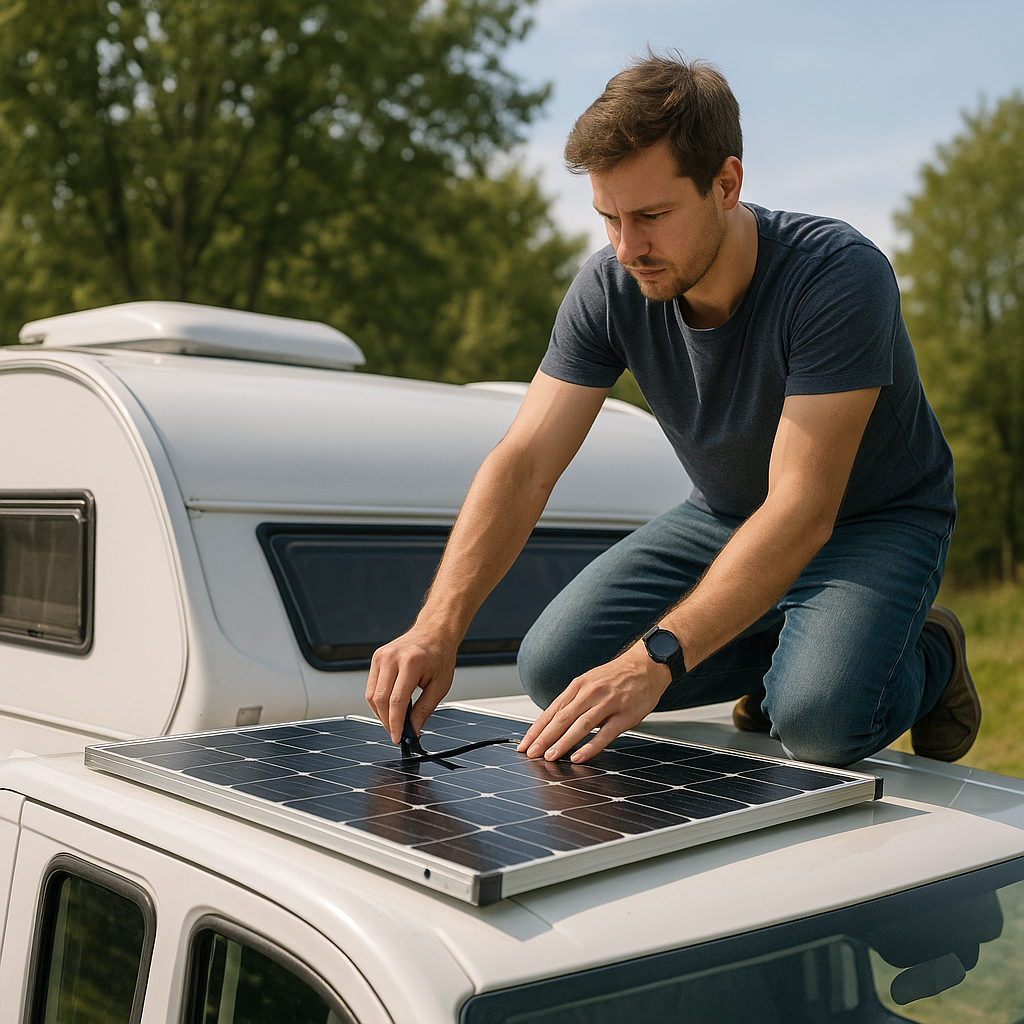
3. Install Mounting Brackets
Attach brackets to the panels first, then mark the roof locations. If drilling into the roof, use butyl tape under brackets and seal all screw heads and edges with RV-safe lap sealant.
Safety tip: Confirm what’s below the roof surface before drilling to avoid wiring or structural damage.
4. Mount the Solar Panels
Secure the panels evenly and check that all hardware is tight but not over-torqued. Make sure airflow can pass under the panels to help reduce heat buildup.
5. Route Solar Cables Into the RV
Use a weatherproof cable entry gland or junction box. Keep cable runs neat and supported. Avoid sharp bends and protect wires anywhere they pass through metal or fiberglass.
6. Install the Charge Controller
Mount the charge controller close to the battery bank to reduce voltage drop on the battery side. Follow the manufacturer’s clearance requirements for ventilation.
Wiring Order Matters
In most systems:
- Connect the charge controller to the battery first
- Then connect the solar panels to the controller
- Finally connect any load terminals if used
Always confirm the correct sequence in your controller manual.
7. Connect the Battery Bank
Use properly sized cables and install a fuse or breaker close to the battery positive terminal. Double-check polarity before making final connections.
If you’re using lithium batteries, verify that your charge controller and converter settings are compatible.
8. Install the Inverter if Needed
If you want 120V AC power, mount the inverter near the batteries with heavy-gauge cables and proper overcurrent protection. Keep the inverter in a dry, ventilated location.
9. Test the System
Use a multimeter and controller display to confirm:
- Correct panel voltage
- Battery voltage
- Charging current
- No fault codes or overheating
Test under sunlight and confirm that the batteries are receiving charge.
10. Secure, Seal, and Monitor
Bundle loose wiring, add cable clamps, and inspect all roof seals. Then monitor system performance for several days to make sure charging matches expectations.
Safety Tips for DIY RV Solar Installation
- Disconnect shore power and turn off the battery disconnect before wiring.
- Cover panels or install them late in the process to reduce live voltage exposure.
- Use correctly sized fuses, breakers, and wire gauges.
- Never mix incompatible battery types in one bank.
- Avoid stepping on weak roof areas.
- Recheck all roof seals after your first trip and after heavy rain.
Common RV Solar Installation Mistakes
Undersizing the System
A 100W panel may help maintain batteries, but it won’t support serious off-grid use.
Ignoring Roof Shade
AC shrouds and antennas can lower output more than many owners expect.
Using the Wrong Wire Size
Voltage drop reduces efficiency and can create heat issues.
Skipping a Battery Monitor
Without one, it’s hard to know actual state of charge and daily usage.
Poor Sealant Work
Water intrusion can cause more damage than any electrical mistake.
Is DIY RV Solar Worth It?
For many owners, yes. A DIY installation can save money, teach you how your RV electrical system works, and make boondocking far more comfortable. The key is staying realistic about your power needs and not cutting corners on safety or waterproofing.
If you only camp occasionally, a portable kit may be enough. If you boondock often, a roof-mounted system with lithium batteries is usually the smarter long-term investment.
FAQ
1. How many solar panels do I need for my RV?
Most RV owners need between 200W and 600W of solar, depending on daily energy use, battery size, and whether they run a fridge, inverter, or other larger loads.
2. Can I install RV solar panels myself?
Yes, many owners can handle a DIY install if they are comfortable with basic tools, roof work, and 12V wiring. If you’re unsure about electrical safety, hire a professional for final wiring or inspection.
3. What is the best battery type for RV solar?
Lithium batteries are generally the best choice for RV solar because they offer deeper usable capacity, faster charging, lighter weight, and longer cycle life than AGM batteries.
Final Thoughts
A successful rv solar panel installation guide starts with good planning, not just buying panels. Size the system around your real power use, choose quality components, protect every circuit, and seal the roof carefully. Done right, RV solar gives you more freedom, quieter campsites, and less dependence on hookups or generators.
At Shop RV Gear, our recommendation for most RVers is simple: choose a scalable roof-mounted system, pair it with an MPPT controller and lithium batteries, and leave room to expand as your camping style evolves.