How to Winterize Your RV: Complete Step-by-Step Guide

Jake has spent 8 years full-timing in a Class A motorhome and has personally tested hundreds of RV products across North America. He is the lead gear reviewer at Shop RV Gear, covering solar setups, backup safety syst…
Why trust us
Every product featured on Shop RV Gear is researched by RV owners with real on-road experience. Our lead reviewer Jake Morris has full-timed for 8 years and personally tested gear across 40+ states. We earn a small commission on qualifying purchases — this never influences our picks.
🛠 What you'll need
-
 View on Amazon →SPLASH RV & Marine Antifreeze -50°F Burst Protection, 1 Gallon (1 Pack)$12.50
 -
 View on Amazon →Camco Permanent Pump Converter Winterizing Kit- Allows You to Use Boat/RV Water Pump to Fill Pipes With Antifreeze - CSA Low Lead Content Certified (36543)$19.99
 -
 View on Amazon →Camco Camper/RV Water Heater By-Pass Kit - Designed to By-Pass Camper Water Heater During RV Winterizing - Features 8-Inch Nylon Reinforced Hose with 2 Brass Valves (35953)$31.02
 -
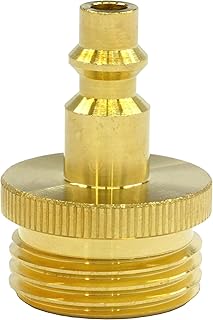 View on Amazon →Winterize Blow Out Adapter for RV, Boat, Motorhome, Camper, and Travel Trailer: Air Compressor Quick-connect Plug to Male Garden Hose Faucet Fitting (Solid Lead-Free Brass)$7.29
How to Winterize Your RV: Complete Step-by-Step Guide
If you're wondering how to winterize RV systems before cold weather hits, the short answer is this: drain all water, bypass the water heater, protect the plumbing with RV antifreeze or compressed air, and make sure no moisture is left where it can freeze. At Shop RV Gear, we've tested winterizing tools and accessories across travel trailers, fifth wheels, and motorhomes, and we can tell you that a careful hour or two now can save you from cracked fittings, burst lines, and expensive spring repairs.
Materials Needed
Before you start, gather everything in one place.

| Item | What It's For | Recommended Notes |
|---|---|---|
| RV/marine antifreeze | Protects plumbing traps and water lines | Use non-toxic pink RV antifreeze, not automotive antifreeze |
| Water heater bypass kit |
Prevents filling the water heater with antifreeze | Many RVs already have one installed |
| Hand pump or built-in winterizing kit | Pulls antifreeze into the plumbing | Needed if your RV doesn't have a siphon hose |
| Air compressor |
Optional blow-out method | Keep pressure regulated to 30-40 PSI |
| Blow-out plug | Connects compressor to city water inlet | Inexpensive and useful |
| Basic hand tools | Remove drain plugs/anode rods, access panels | Socket set, screwdriver, pliers |
| Bucket or drain pan | Catches water from drains and heater | Helps keep the area clean |
| Shop towels | Cleanup | Useful around pump and fittings |
| Battery charger or maintainer | Protects battery during storage | Strongly recommended |
| Tank treatment | Helps prep black and gray tanks | Optional but helpful for storage |
Why Winterizing Your RV Matters
Water expands when it freezes. In an RV, that expansion can split PEX lines, crack faucet bodies, damage water pumps, ruin check valves, and even destroy a water heater if it's not properly drained. Even a small amount of trapped water in a low point or elbow fitting can create a problem.
Winterizing is not just for RVs stored in deep snow. If nighttime temperatures dip below freezing for several hours, your plumbing system is at risk. We recommend winterizing any RV that will sit unused in freezing or near-freezing conditions.
Safety Tips Before You Begin
Follow these basics before touching the plumbing system:

- Turn off all power sources to the water heater. That means 120V electric and LP gas.
- Let the water heater cool completely before removing the drain plug or anode rod.
- Disconnect from city water and turn off the water pump.
- Regulate air pressure if using compressed air. We recommend staying between 30 and 40 PSI to avoid damaging fittings.
- Use only RV/marine antifreeze. Never use automotive antifreeze in any fresh water system.
- Open faucets slowly when draining pressure from the lines.
Before You Start: Know Your RV's Plumbing Setup
Not every RV is winterized exactly the same way. Before you begin, locate these components:
Water Heater
Find the exterior access panel and identify the drain plug or anode rod.
Low-Point Drains
These are usually underneath the RV or inside a lower compartment and allow hot and cold lines to drain.
Fresh Water Tank Drain
Usually a separate drain valve or plug near the tank.
Water Pump and Winterizing Valve
Some RVs have a factory-installed siphon hose for drawing antifreeze directly from the bottle.
Water Heater Bypass Valves
Often located behind a panel near the heater. This setup keeps antifreeze out of the heater tank.
Step-by-Step: How to Winterize Your RV
There are two common methods: antifreeze method and blow-out method. We prefer the antifreeze method for full protection, and many owners combine both for extra peace of mind.
Method 1: Winterize with RV Antifreeze
1. Drain the fresh water system
Start by emptying as much water as possible.
- Turn off the water pump and disconnect city water.
- Open all faucets, including the shower and outside shower.
- Flush the toilet to release trapped water.
- Open the fresh tank drain.
- Open the low-point drains for both hot and cold lines.
Let the system drain fully.
2. Drain the water heater
This is one of the most important steps.
- Make sure the heater is off and cool.
- Remove the drain plug or anode rod.
- Open the pressure relief valve carefully to help it drain faster.
- Let the tank empty completely.
If your RV has a tankless water heater, check the owner's manual for the winterizing procedure. Some units require extra draining steps.
3. Bypass the water heater
Set the bypass valves so antifreeze does not enter the water heater tank. If you skip this, you'll waste several gallons of antifreeze and create more cleanup in spring.
On most systems:
- The cold-water inlet and hot-water outlet valves are turned off.
- The crossover/bypass valve is turned on.
4. Remove or bypass any water filters
Take out inline canister filters, under-sink filters, and refrigerator water filters if equipped. Antifreeze can ruin filter media and leave a bad taste. If your filter housing remains installed, either empty it or use a bypass insert.
5. Connect antifreeze to the system
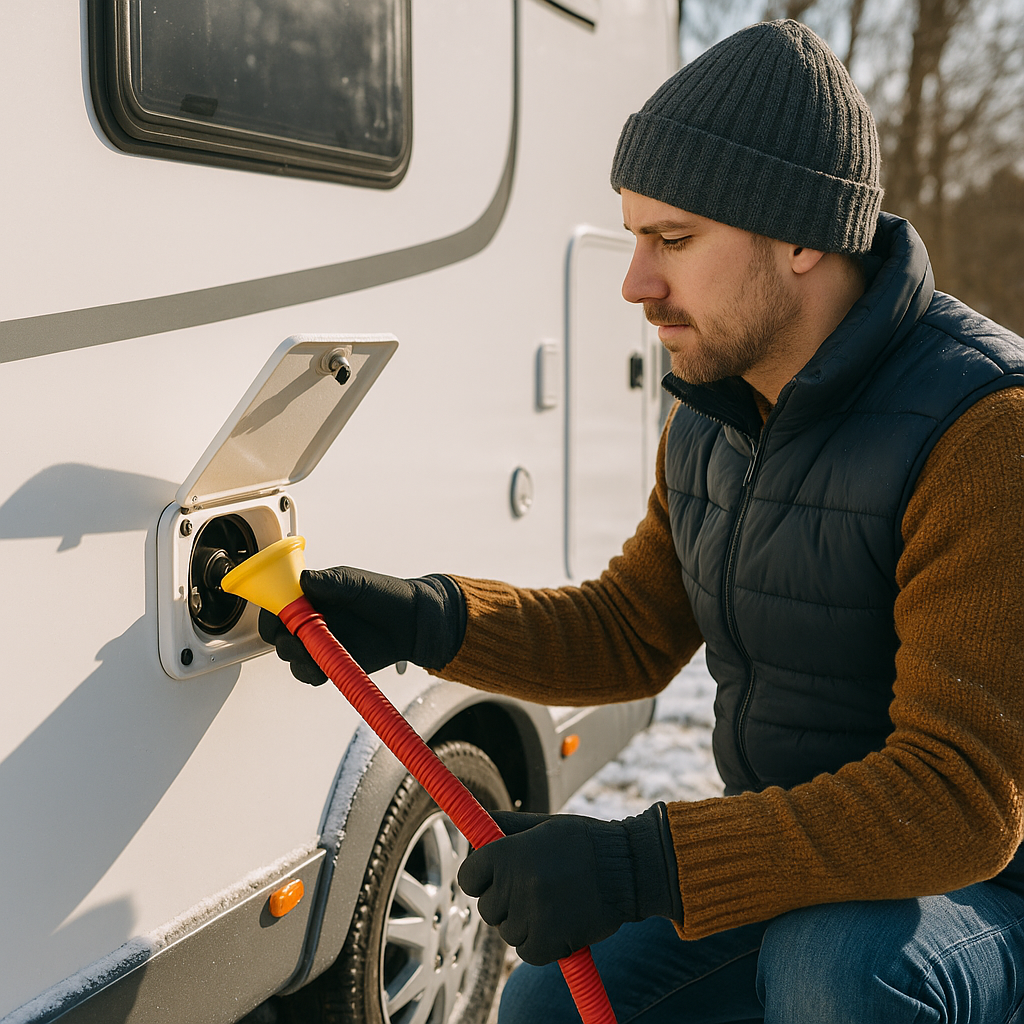
Use your RV's winterizing siphon tube or attach a hand pump to the city water inlet if needed.
Place the siphon hose into a bottle of RV antifreeze, then turn on the water pump.
6. Pump antifreeze through every fixture
Work from the fixture closest to the pump to the farthest, or simply follow a consistent order so you don't miss anything.
At each fixture:
- Open the cold side until pink antifreeze runs steadily.
- Open the hot side until pink antifreeze appears.
- Shut the faucet off and move to the next fixture.
Don't forget:
- Kitchen sink
- Bathroom sink
- Interior shower
- Exterior shower
- Toilet
- Washer hookups
- Ice maker line
- Bar sink or outdoor kitchen sink
- Black tank flush connection, if your RV manual calls for winterizing it separately
7. Protect all drains and P-traps
Pour about 1 cup of RV antifreeze into each sink drain, the shower drain, and the toilet bowl. This protects the P-traps and helps keep seals from drying out.
We also recommend leaving a little antifreeze in the toilet bowl to help protect the flush seal over winter.
8. Finish the holding tanks
Dump and rinse the black and gray tanks before storage. Once empty, add a small amount of tank treatment if you use one for off-season storage.
Do not leave full tanks sitting over winter.
Method 2: Winterize with Compressed Air
Some RV owners prefer blowing out the lines instead of pumping antifreeze through the plumbing. This can work well, but it must be done carefully.
1. Drain the system first
Follow the same draining steps above for the fresh tank, low-point drains, and water heater.
2. Bypass the water heater
Always bypass the heater before introducing air.
3. Attach the blow-out plug
Screw the plug into the city water inlet and connect your compressor.
4. Set pressure to 30-40 PSI
Higher pressure can damage fittings, check valves, and faucet components.
5. Blow out each fixture one at a time
Open each hot and cold valve until only air comes out. Repeat for every fixture, toilet valve, and outside shower.
6. Still add antifreeze to drains and traps
Even if you use air, we recommend adding RV antifreeze to all P-traps and the toilet bowl. Many owners also add a little antifreeze to vulnerable valves for extra protection.
Which Method Is Better?
Antifreeze vs. Compressed Air Comparison
| Method | Best For | Pros | Cons |
|---|---|---|---|
| RV antifreeze only | Most RV owners, colder climates | More complete protection, easier to confirm coverage, protects valves and pump | Requires flushing in spring, uses several gallons |
| Compressed air only | Mild winter areas, experienced owners | Less spring cleanup, quick process | Easier to miss trapped water, depends on technique |
| Blow out + antifreeze in traps/selected lines | Owners wanting extra assurance | Excellent overall protection, less dilution in lines | Takes more time and equipment |
Who It's For
- Use antifreeze method if this is your first time winterizing, your RV will see hard freezes, or you want the safest all-around approach.
- Use compressed air if you're experienced, have a properly regulated compressor, and store in a milder climate.
- Use both methods if you want maximum confidence before long-term winter storage.
Common Winterizing Mistakes to Avoid
Forgetting the outside shower
This is one of the most commonly missed fixtures, and it's often the first place we see freeze damage.
Not bypassing the water heater
You'll waste antifreeze and create unnecessary work.
Leaving water in filters
Filter housings and cartridges can crack if left wet.
Ignoring low-point drains
These are designed to remove trapped water from the lines. Use them.
Using too much air pressure
More pressure is not better. Stay in the safe range.
Skipping the toilet and P-traps
Even if the supply lines are protected, drain traps and seals still need antifreeze.
Storage Tips After Winterizing
Once the plumbing is protected, take a few extra steps to store the RV properly:
- Remove food and anything that attracts rodents.
- Clean the refrigerator and prop the doors open.
- Disconnect the battery or use a maintainer.
- Inflate tires to storage pressure and cover them if exposed.
- Seal obvious pest entry points.
- Check roof seals and slide seals before storage.
- Cover the RV only with a breathable cover designed for RV use.
How to De-Winterize in Spring
When warmer weather returns:
- Reinstall the water heater drain plug or anode rod.
- Return bypass valves to normal operation.
- Fill the fresh water system.
- Flush all lines until water runs clear.
- Sanitize the fresh water system if needed.
- Reinstall filters.
- Check carefully for leaks before your first trip.
We always recommend inspecting under sinks, near the pump, and around the water heater during the first pressurized test.
FAQ
How much RV antifreeze do I need to winterize my RV?
Most RVs need 2 to 4 gallons when using the pump-through method. Larger fifth wheels or motorhomes with more fixtures may need more.
Can I winterize my RV without antifreeze?
Yes, you can use compressed air to blow out the lines, but we still recommend putting RV antifreeze in drains, P-traps, and the toilet bowl.
Do I need to winterize if temperatures only dip below freezing at night?
Yes, if the RV will sit unused and temps stay below freezing for several hours, winterizing is the safer choice.
Can I use automotive antifreeze in my RV plumbing?
No. Only use non-toxic RV/marine antifreeze designed for potable water systems.
Should I leave faucets open after winterizing?
After draining, some owners leave them half-open to relieve any residual pressure, but once antifreeze is in place, the key is simply making sure every fixture has been treated properly.
Final Thoughts
Learning how to winterize RV plumbing the right way is one of the most valuable maintenance skills an owner can have. The process is straightforward once you know your RV's layout, and the cost of supplies is minimal compared to repairing freeze damage. If you're preparing for seasonal storage, we recommend using quality RV antifreeze, confirming your water heater bypass is working correctly, and double-checking every fixture—including the ones that are easy to forget.