How to Winterize Your RV Water System Step by Step

Jake has spent 8 years full-timing in a Class A motorhome and has personally tested hundreds of RV products across North America. He is the lead gear reviewer at Shop RV Gear, covering solar setups, backup safety syst…
Why trust us
Every product featured on Shop RV Gear is researched by RV owners with real on-road experience. Our lead reviewer Jake Morris has full-timed for 8 years and personally tested gear across 40+ states. We earn a small commission on qualifying purchases — this never influences our picks.
Short answer: how to winterize your RV water system, step by step
To winterize your RV water system, you need to drain every tank, bypass and drain the water heater, then either blow out the lines with compressed air, run RV antifreeze through every fixture, or use a combination of both.[1][2][3][8] You’ll open all faucets and low‑point drains to remove water, switch your water heater to bypass, then use a pump‑side winterizing hose or converter kit to pull RV antifreeze into the system until it runs pink from every tap, toilet, and outside shower.[1][3][4][5][8] Finally, you’ll pour antifreeze into each drain to protect P‑traps and leave the RV powered down and ready for freezing temps.[1][3][4][8]
This guide walks through both the RV antifreeze and compressed‑air methods, shows when to combine them, and calls out specific tools that actually make the job easier.

Step 3: Choose your method – antifreeze, air, or both
Here’s a quick comparison to decide how you want to proceed.
| Method | Best for | Pros | Cons |
|---|---|---|---|
| RV antifreeze only | Most owners; plug‑and‑play rigs | Very forgiving, easy to verify (pink flow) | Uses more antifreeze; some don’t like taste/film |
| Compressed air only | Mild climates, weekend winter use | No antifreeze taste, less cleanup | Need good compressor; small pockets of water may remain |
| Combo (air + antifreeze) | Long, cold storage; expensive rigs | Maximum protection with less antifreeze | Requires both tools and a bit more time |
The antifreeze method is the most common and beginner‑friendly, so we’ll cover it first, then the air method, then how to combine them.
Why winterizing your RV water system matters
If you park an RV in freezing weather with water still in the plumbing, you’re gambling with cracked PEX lines, split fittings, burst faucets, and a destroyed water heater tank.[2][3] Any trapped water can expand as it freezes and turn into a four‑figure repair.

Proper winterizing:
- Protects fresh, gray, and black tanks, water heater, pumps, and lines from freeze damage[2][3][5]
- Prevents nasty odors and bacteria growth in stagnant water and holding tanks[5]
- Lets you de‑winterize quickly in spring instead of chasing leaks and clogs[1][2]
If you store your RV where it can hit freezing—even occasionally—you should winterize.
Gear you actually need (and what to skip)
You can winterize with RV antifreeze, compressed air, or a combination. The combo method is what many experienced RVers prefer: blow out the lines first, then run a smaller amount of antifreeze as cheap insurance.[1][5][6][8]
Core winterizing gear
Must‑have items:
- Non‑toxic RV/Marine antifreeze (pink) – Formulated for potable systems and rated for sub‑freezing temps.[1][3][4][5] Most RVs take 2–4 gallons for a full antifreeze‑only winterization; combo method often needs 1–2 gallons.[3][4][5]
- Water pump converter kit or winterizing hose – Lets your RV’s 12V pump draw antifreeze directly from a jug instead of the fresh tank.[1][3][4][5][8]
- Water heater bypass kit or built‑in bypass valves – Prevents you from filling your water heater with gallons of antifreeze you don’t need.[2][3][5][8]
- Basic hand tools – Usually a socket or box wrench for the water heater drain/anode rod, and a screwdriver for panels.[2][3][5]
- Disposable gloves & shop towels – Antifreeze gets messy; gloves help keep it off your skin.
If using the compressed‑air method (optional but recommended):
- Small air compressor with regulator (around 30–50 PSI is typical for RV plumbing).[1][5][8]
- Blow‑out plug (RV city‑water adapter that lets you connect the compressor hose to your RV’s city water inlet).[1][6][8]
What to skip or be wary of
- Household (green) automotive antifreeze – Toxic and not for RV plumbing.
- “Miracle” inline gadgets that claim one‑step winterizing – You still need to drain and protect all fixtures; no shortcut replaces a full walkthrough.
- High compressor pressures – Anything much above ~50 PSI risks damaging fittings.[1][6][8]
Before you start: prep and safety
Do these first regardless of method:[1][2][3][5]
- Turn off water heater and let it cool completely. Never drain a hot or pressurized tank.[2]
- Shut off power to water heater (propane and electric) so it can’t fire while empty.[2]
- Disconnect from city water and turn off your RV’s water pump.[2][6]
- Open a faucet to relieve pressure in the system.[2][3][6]
- Turn off ice maker, washing machine, dish washer, and on‑demand water systems if equipped; check manuals for specific winterizing procedures.[3][5]
Step 1: Drain and flush tanks
You want every major tank empty before introducing air or antifreeze.[2][3][4][5]
Dump black and gray tanks at a dump station.[5]
- Open black tank valve, drain fully, then close.
- Open gray tank valve, drain fully, then close.[5]
- If there’s no built‑in flush, use a tank flush wand through the toilet to rinse the black tank until the water runs mostly clear.[3][5]
Drain the fresh water tank.
- Make sure pump is off and no city water is connected.[2]
- Open the fresh tank drain valve/plug and let it empty completely.[2][5]
Open low‑point drains (usually one hot and one cold) to remove remaining water in the supply lines.[2][3][5]
- Open all faucets and the toilet valve so air can enter and help lines drain.[3][4][5]
- Once drained, close the low‑point drains and faucets for now.[2][4][5]
Step 2: Drain and bypass the water heater
You never want to pump pink RV antifreeze into a full‑size tank water heater — it wastes gallons and leaves a mess.[2][3][5]
- Confirm water heater is cool and power is off.[2]
- Open the exterior water heater access panel.
- Relieve pressure by carefully lifting the pressure relief valve for a moment.[2]
- Remove the drain plug or anode rod with an appropriate socket and let the tank drain completely.[2][3]
- Once drained, leave the plug out or loosely re‑install depending on your preference and manufacturer’s guidance.
- Bypass the water heater.
- Use the built‑in valve panel or a manual bypass kit at the back of the heater to route water around the tank.[2][3][5][8]
- Double‑check: in winterize mode, no antifreeze should flow into the heater.[8]
Step 4: Antifreeze method – pump pink through every line
This assumes you’ve already drained tanks and bypassed the water heater.[1][2][3][4][5][8]
4.1 Set up the pump to draw antifreeze
- Locate the water pump. It’s often under a dinette, bed, or in a lower cabinet.[8]
- Install or switch to winterize mode:
- If you have a water pump converter kit/winterize valve, turn the valve so the pump draws from the antifreeze hose, not the fresh tank.[3][5][8]
- If you don’t, disconnect the inlet line from the fresh tank and attach a short piece of hose that goes into your antifreeze jug.[3][5]
- Place the hose fully into the bottom of the antifreeze jug so it doesn’t suck air.[5][8]
4.2 Pressurize the system with antifreeze
- Close all faucets and low‑point drains (they should already be closed from earlier).[2][3][4][5]
- Turn on the water pump and let it pull antifreeze into the lines until the system pressurizes.[3][4][8]
4.3 Run antifreeze to every fixture
The rule: one side at a time, from closest to farthest from the pump, until you see solid pink.[3][4][5][8]
Typical order (yours may differ):
Kitchen sink
- Open cold side until you see steady pink antifreeze, then close.[3][4][5][8]
- Open hot side until pink runs out, then close.
Bathroom sink – Same process: cold, then hot.[3][4][5]
Shower/tub
- Remove the shower head if you want less mess.
- Run cold until pink, then hot until pink.[3][4][5][8]
Toilet
- Flush or hold the valve open until you see pink antifreeze entering the bowl.[3][4][5][8]
- Let a bit more run so the valve and internal passages are protected.[5]
Outside shower / spray port – Often forgotten, often the first to freeze.
- Run cold then hot (or each handle) until pink flows.[3][4][5]
Additional fixtures: bar sinks, washer hookups, ice maker feeds, drinking water taps — follow manufacturer instructions, but the principle is the same: run until pink.[3][5]
Watch your jugs and swap in a new antifreeze container before it runs dry so you don’t suck air and lose prime.[3][5][8]
4.4 Protect P‑traps and drains
Even with antifreeze in the supply lines, the P‑traps under your sinks and shower can still hold plain water.[1][3][4][5][8]
- Turn off the pump once all fixtures run pink.[4][5][8]
- Pour about 1 cup of RV antifreeze down each drain (kitchen, bathroom, shower) to displace any water in the P‑traps.[1][3][4][5][8]
- Flush a bit of antifreeze into the toilet bowl so some sits in the bowl and seals.[3][4][5]
At this point, your entire water system is filled or protected with antifreeze, including lines, fixtures, and traps.[1][3][4][5]
Step 5: Compressed‑air method – blow out the lines
The air method pushes water out with regulated compressed air and uses little or no antifreeze in the lines.[1][5][6][8]
Important: Always follow your RV’s manual, use a regulator, and keep pressure in the 30–50 PSI range to avoid damaging plumbing.[1][6][8]
5.1 Setup for compressed air
- Drain fresh tank, gray/black tanks, and water heater, and open low‑point drains, as covered earlier.[2][3][4][5]
- Close low‑point drains and reinstall the water heater drain plug/anode if desired once everything is empty.[2][3][4]
- Attach a blow‑out plug to your RV’s city water inlet.[1][6][8]
- Connect your air compressor hose to the blow‑out plug and set the regulator (often around 40 PSI is a safe target).[1][6][8]
5.2 Blow out lines from highest to lowest
- With all faucets closed, start the compressor to pressurize the system.[1][6][8]
- Open one faucet at a time, starting with the fixture furthest or highest from the inlet (opinions vary; the key is to be systematic).[1][6]
- Open the cold side first until only air comes out, then close.
- Open the hot side until only air comes out, then close.[1][6][8]
- Repeat on every fixture: kitchen sink, bathroom sink, shower, outside shower, toilet valve, etc.[1][4][5][6]
- Briefly open the low‑point drains again, then close once only air is coming through.[2][3][5]
Many RVers still pour a cup of RV antifreeze into each drain to protect P‑traps even when using the air‑only method.[1][3][4][5][8]
Step 6: Combo method – what most long‑term RVers trust
The combo method is what I recommend if your rig will sit through real winter:
- Drain tanks and water heater, and bypass heater (Steps 1–2).[2][3][5]
- Blow out lines with compressed air (Step 5) to remove the bulk of water.[1][6][8]
- Switch to winterize mode and run RV antifreeze through the system (Step 4), but you’ll usually need less total antifreeze because you’re not displacing as much water.[5][6][8]
- Finish with antifreeze in P‑traps and toilet bowl.[1][3][4][5]
This gives you the confidence of both methods with modest extra time and a couple gallons of antifreeze.
Special systems: filters, ice makers, and washers
Inline water filters
- Remove and bypass any inline water filters before winterizing.[1][3]
- Do not run RV antifreeze through most carbon filters; it can ruin them. Replace with a new cartridge in spring.[1][3]
Ice makers and residential fridges
- Check your appliance manual — procedures vary.
- Many manufacturers recommend using compressed air to clear the line and sometimes running a small amount of RV antifreeze through the supply, then discarding the first several ice batches in spring.[3][5]
Washing machines and dishwashers
- Most RVers blow out the lines to the appliance first.
- Then, following the manual, run a short cycle to pull some antifreeze into the pump and internal passages, or follow manufacturer’s specific winterizing program if available.[3][5]
Common mistakes that crack rigs (and how to avoid them)
Based on both manufacturer guidance and long‑time RV techs, these are the big ones:[2][3][4][5]
- Forgetting the water heater bypass – You’ll burn through gallons of antifreeze and still risk damage.
- Leaving low‑point drains or faucets open when pumping antifreeze – You’ll lose antifreeze outside instead of getting it to fixtures.[2][4][5]
- Skipping the outside shower or spray port – These fittings freeze first.[3][4][5]
- Not draining the fresh tank fully – Residual water can freeze, expand, and damage the tank or fittings.[2][5][8]
- Using automotive antifreeze – Toxic and not meant for potable water systems.
- Too much air pressure – Over‑pressurizing can blow fittings and seals.[1][6][8]
Spring de‑winterizing (quick overview)
In spring, reversing the process is straightforward:
- Reconnect all drains and plugs (water heater, low‑point drains, fresh tank).
- Take the water heater out of bypass so it can fill again.[2][3][5][8]
- Fill the fresh tank with clean water and run the pump.
- Open each faucet (hot and cold) until water runs clear and antifreeze is flushed out.[1][3][4][5]
- Sanitize the fresh water system (commonly with a diluted household bleach solution, per your owner’s manual) and flush thoroughly.[2][5]
- Replace all water filters with new cartridges.[1][3]
Frequently Asked Questions
How many gallons of RV antifreeze do I need to winterize my RV?
Most average travel trailers and fifth wheels need 2–4 gallons of RV/marine antifreeze for a full antifreeze‑only winterization, depending on length and number of fixtures.[3][4][5] Using the combo method with compressed air first, you can often get by with 1–2 gallons because there’s less water to displace.[5][6]
Do I really have to bypass my water heater?
Yes, you should always bypass a tank‑style water heater before pumping RV antifreeze.[2][3][5] Without a bypass, you’ll waste several gallons of antifreeze filling the heater tank, and it’s harder to flush clean in spring. Factory water heater bypass valves or aftermarket kits are inexpensive and pay for themselves in a season or two.[2][3]
Can I use compressed air instead of RV antifreeze?
You can winterize with compressed air only by thoroughly blowing water out of all lines and fixtures.[1][5][6][8] Many owners still pour some RV antifreeze into P‑traps and the toilet bowl, even with air‑only, to protect those pockets of water.[1][3][4][5] In very cold climates or for expensive rigs, the combo method (air plus a smaller amount of antifreeze in the lines) is widely considered the safest approach.[1][5][6][8]
Is RV antifreeze safe for drinking water systems?
RV/marine antifreeze (usually pink) is specifically formulated for potable water systems and labeled non‑toxic when used as directed.[1][3][4][5] You still shouldn’t drink it; instead, flush and sanitize your system in the spring until water runs clear and tastes normal, then replace filters before using the water for drinking.
How long does it take to winterize an RV water system?
Once you know your rig’s layout, a typical travel trailer or fifth wheel can be winterized in 45–90 minutes, including tank draining, water heater bypassing, and running antifreeze or air through all fixtures.[2][3][5][8] The first time might take longer as you locate valves and low‑point drains; many RVers keep a repeatable checklist in their rig so future seasons go faster.
Final gear checklist
Use this as a quick once‑per‑season checklist:
- RV/marine antifreeze (2–4 gallons on hand is a safe bet)[3][4][5]
- Water pump converter kit or winterizing hose[1][3][4][5][8]
- Water heater bypass (factory or aftermarket)[2][3][5]
- Blow‑out plug and air compressor with regulator (optional but recommended)[1][6][8]
- Basic hand tools (socket/wrench for anode rod, screwdriver)[2][3][5]
- Gloves, towels, flashlight
Follow the steps in order, don’t rush the first season, and you’ll only need to pay for winterizing once: in antifreeze and a bit of time, not in cracked pipes and a ruined water heater.
Top Picks & Comparison
| # | Product | Price | Rating | ||
|---|---|---|---|---|---|
| #1 |  |
SPLASH RV & Marine Antifreeze -50°F Burst Protection, 1 Gallon (1 Pack) |
$12.50 | (899) | View on Amazon |
| #2 |  |
Camco Permanent Pump Converter Winterizing Kit- Allows You to Use Boat/RV Water Pump to Fill Pipes With Antifreeze - CSA Low Lead Content Certified (36543) |
$19.99 | (3,380) | View on Amazon |
| #3 |  |
Camco Camper/RV Water Heater By-Pass Kit - Designed to By-Pass Camper Water Heater During RV Winterizing - Features 8-Inch Nylon Reinforced Hose with 2 Brass Valves (35953) |
$31.02 | (523) | View on Amazon |
| #4 | 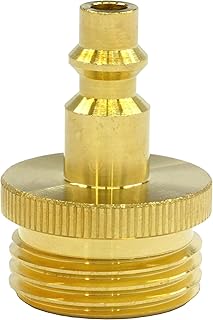 |
Winterize Blow Out Adapter for RV, Boat, Motorhome, Camper, and Travel Trailer: Air Compressor Quick-connect Plug to Male Garden Hose Faucet Fitting (Solid Lead-Free Brass) |
$7.29 | (3,148) | View on Amazon |